Browse to the Liquibase Core project in GitHub: https://github.com/liquibase/liquibase
Fork it
Clone it to your local system
Make a new branch
Make your changes
Push your changes back into your repo
Click the Compare & pull request button
Click Create pull request to open a new pull request at liquibase/liquibase
Open a browser and navigate to the Liquibase project in GitHub: https://github.com/liquibase/liquibase
Click on the Fork button in the top-right corner.

This creates a new copy of Liquibase under your GitHub user account with a URL like:
https://github.com/<YourUserName>/liquibase |
and includes all the code, branches, and commits from the original repo.
Clone the source repo by opening the terminal on your computer and running the command:
git clone https://github.com/<YourUserName>/liquibase |
This repo also includes the unit tests for Liquibase Core. See this page for more information on writing or enhancing Liquibase Core unit tests.
Once the repo is cloned, you need to do two things:
Create a new branch by issuing the command:
git checkout -b new_branch |
Create a new remote for the upstream repo with the command:
git remote add upstream https://github.com/liquibase/liquibase |
In this case, "upstream repo" refers to the original repo you created your fork from.
Now you can make your changes and additions to Liquibase Core.
Push your changes back to your repo in GitHub.
git push -u origin <newBranchName> |
When you do, the Compare & pull request button will appear in GitHub.
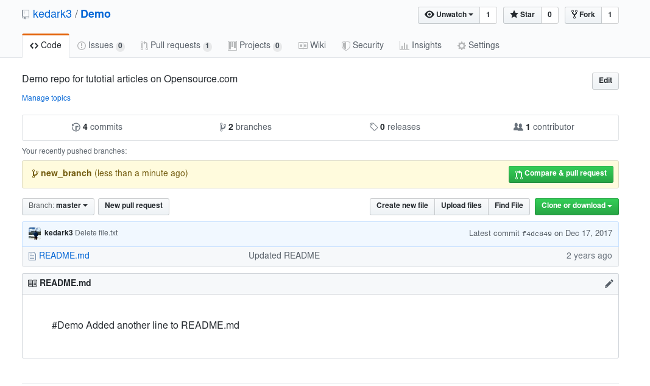
Open a pull request by clicking the Compare & pull request button. This allows the Liquibase maintainers to review your contribution. Click it and you'll be taken to this screen:
.png?version=1&modificationDate=1587037336850&cacheVersion=1&api=v2 "Liquibase Beta > How to Contribute Code to Liquibase Core > image (2).png")
This will submit your pull request for our team to review.
Thank you for submitting your pull request! We will review it for completeness, prioritize it, and schedule it to be integrated into Liquibase Core. You will receive updates on the progress of your PR in the comment section of your PR’s GitHub page.